What Orca Slicer Treats As A Bridge
Bridging is printing across a gap with no support underneath. When Orca Slicer detects that kind of span, those lines stop behaving like ordinary walls or infill and use the bridging parameters instead. That is why one bridge can fail while the rest of the print looks clean.
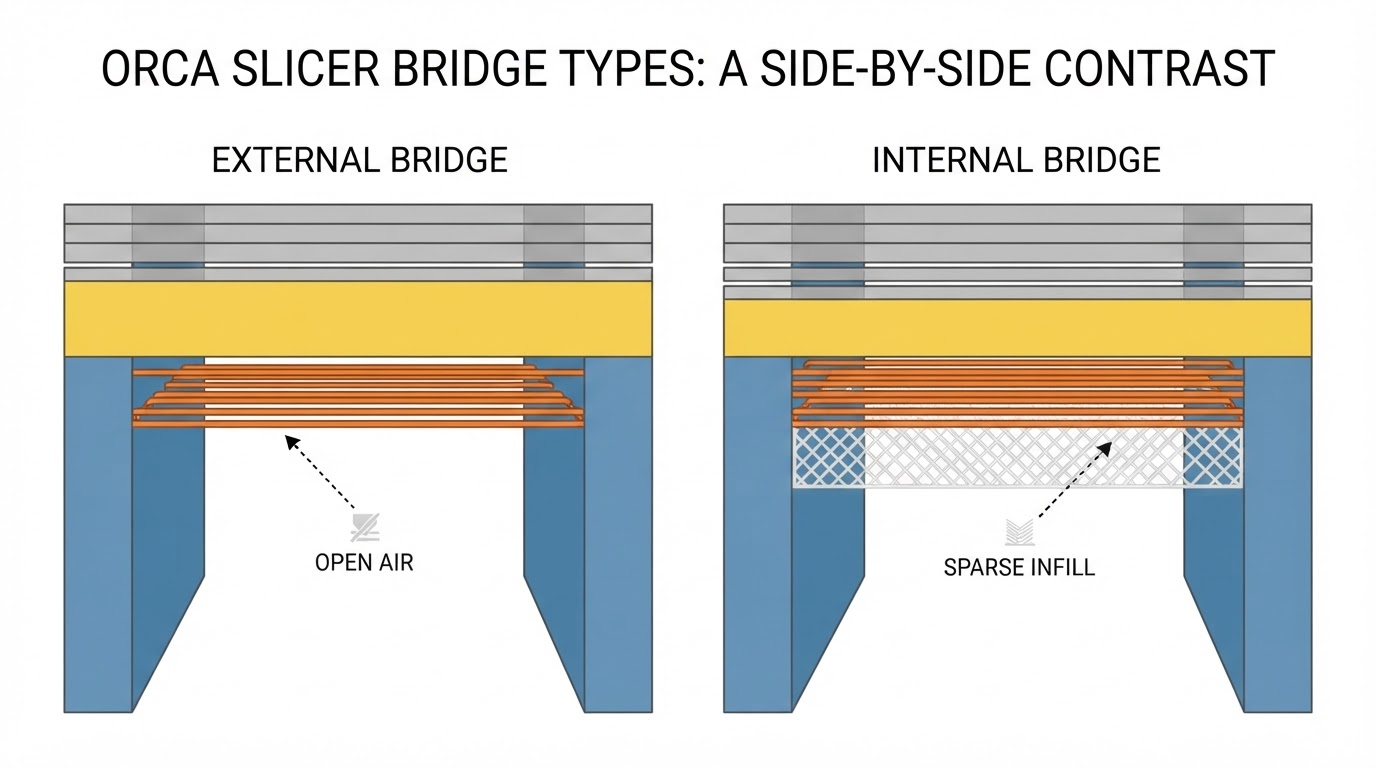
The parameters are documented on the Bridging page of the official OrcaSlicer wiki, and they split into two jobs that move in opposite directions. External bridges span open air; internal bridges cross sparse infill to give the top shell a solid base. For flow, the guidance is explicit: reducing the flow ratio helps external bridges when material tends to sag, while increasing internal bridge flow can enhance strength and upper-layer quality. Values below 1.0 reduce material and improve sagging; values above 1.0 improve line contact and strength. The flow used is your bridge value multiplied by the filament and object flow ratios, so it stacks on top of your existing calibration.
External bridges span open air, while internal bridges span sparse infill — the same word, two different jobs. Check which one failed before copying a fix from the other.
Read The Failure Before You Change A Value
Sagging and breaking rarely share a fix. Use the symptom in front of you to pick the lever, then write down what you changed.
What you see | Likely cause | First lever to try | What to log |
|---|---|---|---|
Loops droop mid-bridge | Too much material for the span | Lower the bridge flow ratio below 1.0 | Bridge flow value |
Lines are broken, thin, or missing | Too little material reaching the gap | Raise bridge flow toward 1.0, or bridge density above 100% | Flow and density |
Bridge surface rough or pebbled | Overlap and excess material | Lower density and check whether thick bridges are on | Density and thick-bridge state |
Top surface pillows or curls over a slope | Small internal bridges were filtered out | Switch internal bridge filtering toward limited or no filtering | Model slope |
Counterbore holes sag or fray | Unsupported hole area | Enable counterbore hole bridging | Hole size and mode |
Short spans pass, long spans fail | The span is beyond what the profile can bridge | Try thick bridges for strength, expecting a rougher surface | Span in millimeters |
Two rows need a word of explanation. Thick bridges use a line height equal to the nozzle diameter: that improves strength and lets you span longer distances, but the finish gets rougher, and the guidance recommends it for internal bridges while suggesting it externally only on shorter spans or with large nozzles. The filtering row matters on curved or heavily slanted models, where filtered internal bridges can let unsupported solid infill curl and cause pillowing.
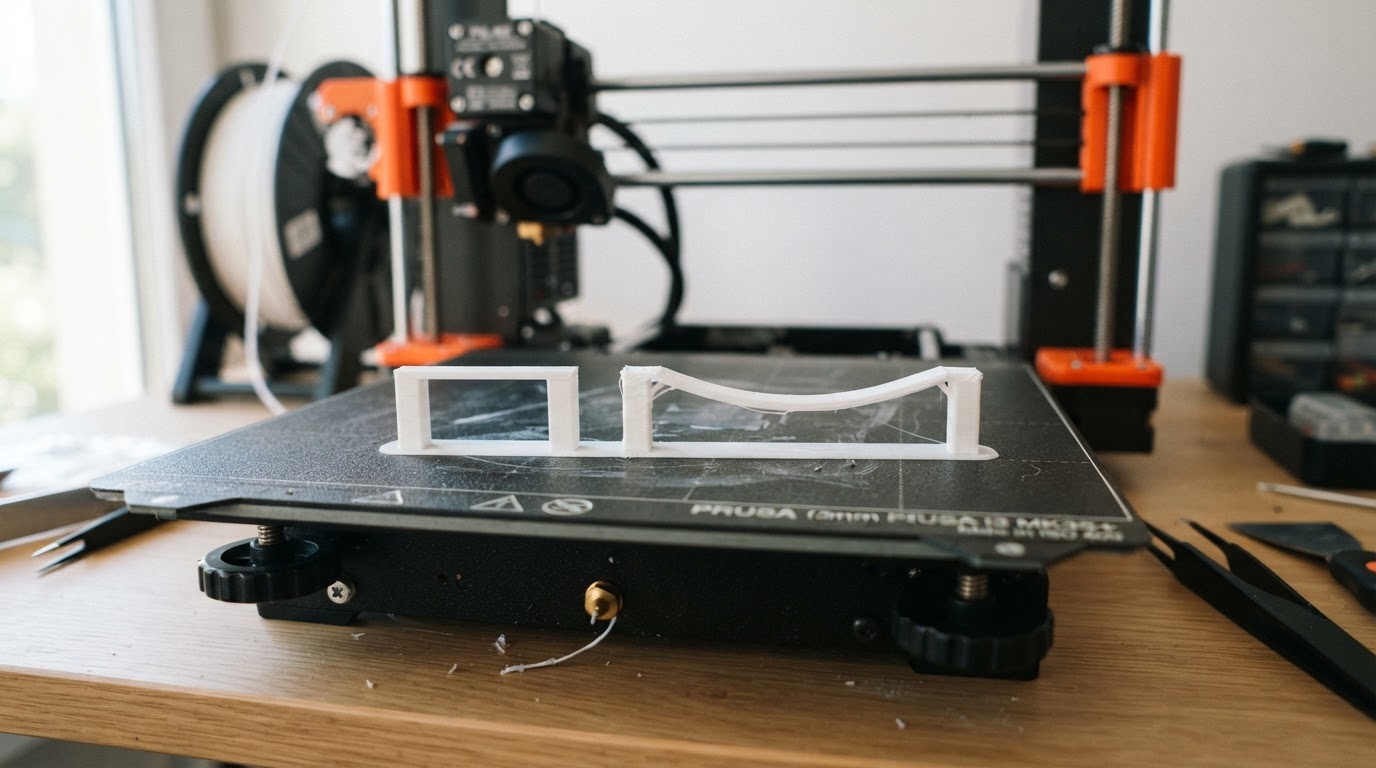
The clearest way to learn this is to print a bridge test piece that puts a short span and a long span side by side.
Record These Facts Before Any Test
Label every test:
- Orca Slicer version. Newer options are marked by release, so an older install and a nightly build do not expose the same controls (wiki home).
- Filament, nozzle, and layer height. They change how far a strand can travel before it droops.
- Part cooling fan percentage, recorded as a number rather than "high" or "low".
- Bridge span in millimeters. A fix that saves a 10 mm span may do nothing at 40 mm.
A One-Variable Test Loop
The loop below is the whole method: read the failure, pick the matching lever, change one variable, and verify it in the slice preview before touching anything else.
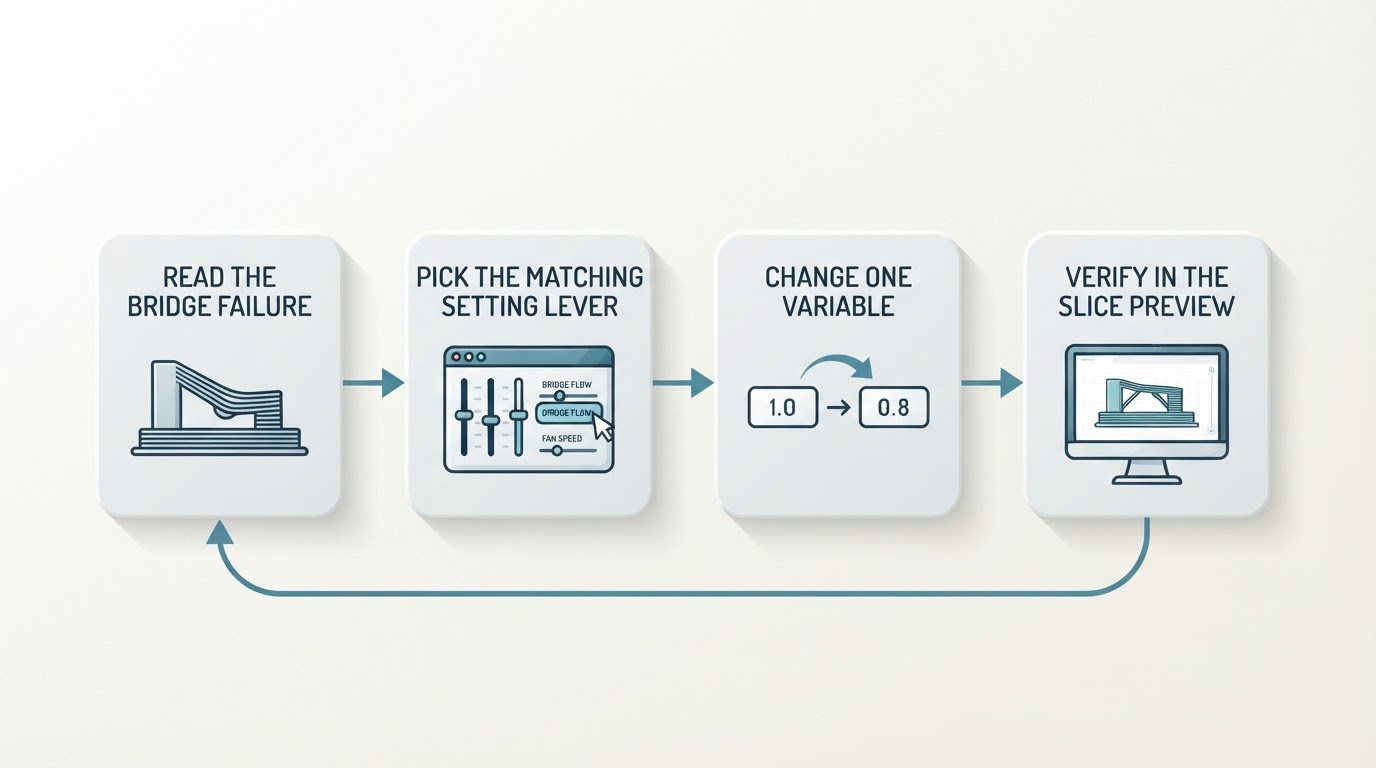
- Pick a bridge test piece that includes the span you actually need, and slice it once with your current profile.
- In the preview, check that Orca Slicer treats the span as a bridge and note the direction the lines run. With extra bridge layers enabled, the second layer is parallel to the first externally and as close to perpendicular as possible internally; when one island holds regions with different bridge angles, the last region becomes the angle reference.
- Change exactly one value and slice again: bridge flow first, then density, then extra bridge layers or thick bridges.
- Print, and photograph the baseline and the new test under the same light. Compare the underside of the span, not the model's top.
- Keep the change only if the bridge improves, and log the value. The completion standard: a straight bridge across your target span, no visible loop sag, no gaps, reproduced twice.
Changing two settings at once destroys the evidence.
Material And Cooling Tradeoffs
Cooling is the quiet variable: a strand that solidifies while its ends are anchored sags less, so airflow over the span usually helps. Density cuts both ways here — below 100 percent creates space for air to circulate but can also lead to sagging, while above 100 percent overlaps lines for support at the risk of overextrusion.
- PLA solidifies quickly, tolerates aggressive cooling, and usually responds well to a lower bridge flow.
- PETG stays soft longer and heavy cooling costs layer adhesion, so prefer density or extra layers over big fan changes.
- ABS and ASA are limited by warp risk, so they lean on flow, density, and thick bridges; an enclosure changes the air, so re-run the test after closing the door.
- TPU keeps flexible strands soft and bridges poorly; keep spans short and accept that some geometry needs support.
These are directions of change, not universal values. The printed result decides.
Limitations
The official OrcaSlicer bridging documentation explains what each setting does, not what your printer will achieve with your filament. Bridge settings control only the bridging extrusion: if the anchors are weak or the cooling duct does not reach the span, no parameter will save it. They also evolve between releases, so an old value may not match what your version exposes. Treat every number, including this one, as a starting point a one-variable test must confirm. For broader speed tuning outside bridges, use the site's separate OrcaSlicer speed settings guide.
FAQ
What should I change first when Orca Slicer bridges sag?
Bridge flow. The official guidance says reducing the flow ratio helps external bridges when material tends to sag. Change it in small steps, keep the span fixed, and compare prints.
Why do only my internal bridges look bad?
They are a different job. They sit under the top shell over sparse infill, where increasing internal bridge flow can enhance strength and upper-layer quality, and thick internal bridges are recommended. Also check whether small internal bridges are being filtered out on slanted surfaces.
Does an extra bridge layer fix a sagging first layer?
It improves the result rather than hiding the cause: extra layers reduce pillowing and separation because the solid infill above has a better base. If the first layer sags badly, fix flow first.


