The Short Answer: Spiral Vase Produces One Wall, Not Two
Orca Slicer's official documentation defines spiral vase as a mode that transforms a solid model into a single-walled print with solid bottom layers, eliminating seams by continuously spiralling the outer contour (Special Mode). The nozzle never finishes a loop, steps up, and starts the next one; it climbs while it circles the model.
That leaves no room for a second wall. Two concentric loops at the same height cannot be traced as one continuous spiral, because the path would have to stop, travel across, and restart. Orca Slicer confirms the wall-count assumption indirectly: when spiral vase mode is on, the wall loop direction option is disabled, since no separate loops are left to reverse (Walls and surfaces).
So vase mode with two walls describes an outcome, not a checkbox, and vase mode with multiple walls is the same story. If you want a print that behaves like it has two walls, there are two honest routes: make the one spiral wall thicker, or turn spiral vase off and slice a conventional two-loop print.
Why the Standard Spiral Mode Does Not Make Two Walls
A standard spiral-vase toolpath is one line rising continuously around a single closed outline. Two conventional wall loops at the same height require a different toolpath; Orca Slicer's documented spiral mode does not offer that as a second wall. Switching modes changes the continuity that gives a vase its seam-free surface.
The same geometry decides which models qualify. Each layer needs one closed contour the nozzle can follow. A layer with an island, a split wall, or a hole interrupting the outer outline cannot be traced as a single perimeter. Continuity is a property of the whole object, not a per-region paint, so there is no partial vase mode that spirals one section while a neighboring section keeps two closed loops in the same pass.
Option 1: Widen The Single Wall (Still One Wall)
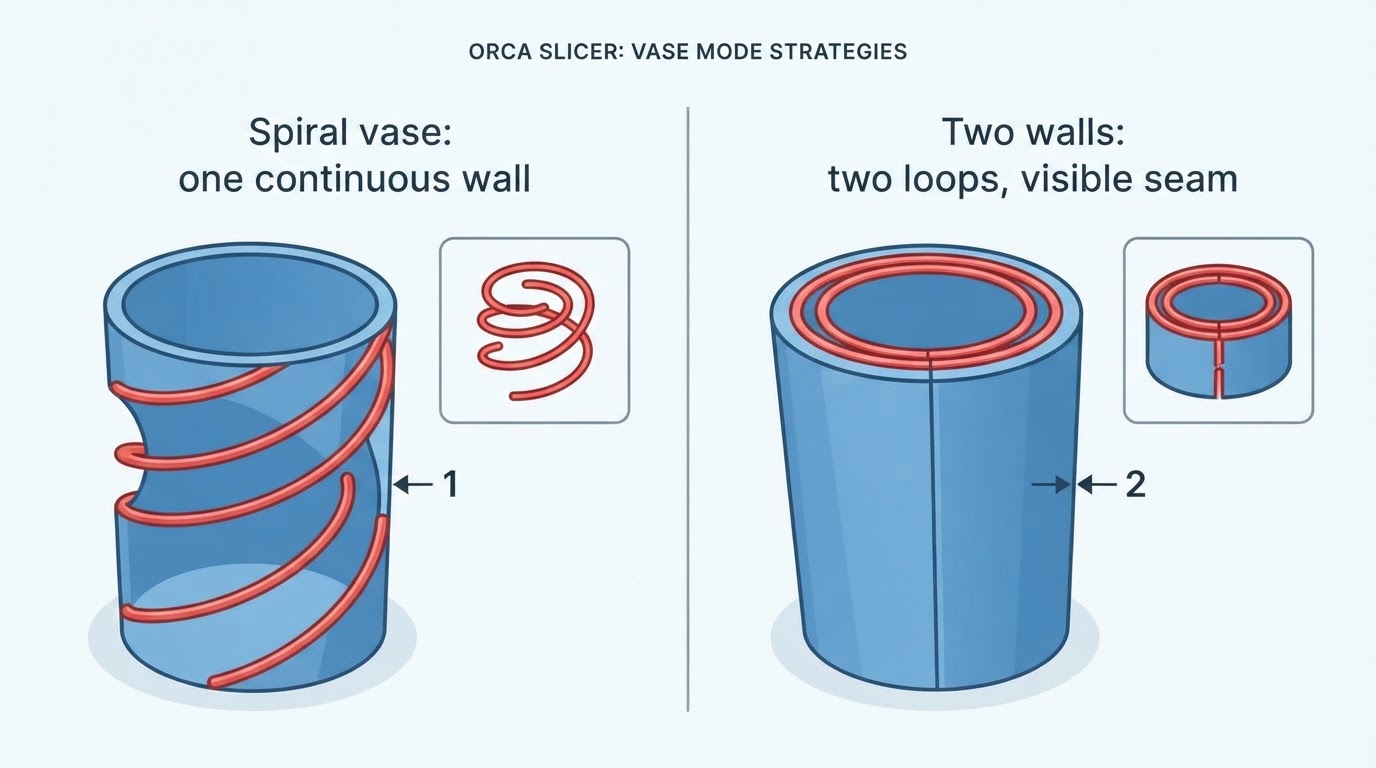
Keep spiral vase on and widen that perimeter's extrusion. The single pass then carries more material, which is what sets vase mode wall thickness: the wall gets stiffer, more opaque, and less likely to show pinholes where layers meet.
What you do not get is a second wall. The result is one thicker extrusion, not two loops with material between them, and it will not match the stiffness of a genuine two-perimeter print with infill. There is a practical ceiling too, because the line still has to be laid down cleanly by the nozzle in front of you.
Two documented vase mode settings in the same Special Mode section matter while you tune:
- Smooth Spiral smooths X and Y movement as well as the gradual Z rise, which can hide seams even on walls that are not vertical.
- Max XY Smoothing limits how far the path may shift sideways to keep the spiral smooth, as a length or a percentage of nozzle diameter; the documentation warns that higher values may distort the model slightly.
Spiral starting and finishing flow ratios are documented in the same section. They exist because flow has to scale in as the spiral begins and out as it ends, and the defaults can leave the bottom or the top rim slightly under-extruded (Special Mode).
Option 2: A Conventional Two-Wall Slice (Spiral Vase Off)
If you genuinely want two walls, stop trying to bend vase mode. Turn spiral vase off and set wall loops to 2. Wall loops is the number of times the outer wall is printed in a loop; the documentation notes that raising it improves layer adhesion, strength, and rigidity, reduces infill ghosting, and increases print time (Walls).
Two loops mean two real perimeters per layer, the usual top and bottom shells, and the option to add infill or more shells. The trade is the seam: layer-by-layer printing starts and stops each loop, so seam marks return and the continuous spiral surface is gone.
Decision Table
What you want | Spiral vase | Wall loops | What the preview should show | What you give up |
|---|---|---|---|---|
Seam-free surface, one wall | On | 1 | One continuous contour climbing without a per-layer seam | Thickness and strength of a single line |
A thicker wall, still seamless | On | 1 | The same single contour, printed with a wider extrusion | Still one wall, and practical width limits |
Genuinely two walls | Off | 2 | Two closed loops per layer with normal seam and layer starts | The continuous spiral and its clean surface |
Maximum strength and rigidity | Off | 2 or more | Multiple loops, shells, and infill behind them | Weight and print time |
Verify It In Your Own Slice Preview
These steps are a way to check the behavior on your machine, not a report of test screenshots. Run them against the model and version you actually plan to print.
- Duplicate your process preset first, so the experiment never overwrites a working profile.
- Load a single open vessel with one closed outline per layer and no islands.
- Enable spiral vase. In recent 2.4.x builds the option sits in Special Mode among the process settings; treat tab names and option locations as version-sensitive and confirm them in the wiki for your release.
- Slice and open the preview. Use the line-type legend to follow the wall, then step up through the layers; above the solid base you should be tracing one continuous path.
- Step two or three layers above the base and look for a per-layer seam or start mark. Its absence is the visual signature of a continuous spiral.
- Turn spiral vase off, set wall loops to 2, and slice again. Compare the same layers: two separate perimeter lines should appear, along with a normal seam and the usual top shell behavior.
- Completion check: if a mid-height layer still shows two separate wall lines while spiral vase is on, the mode did not apply to the object you sliced, or the model does not meet the single-contour condition. Re-slice and confirm before printing.
Limits, Trade-offs, And Version Notes
- There is no multi-wall output from spiral vase. It is documented as a single-walled print, so any two-wall result comes from leaving the mode.
- Wall-loop controls are inactive in spiral vase; the wall loop direction setting is explicitly disabled when the mode is on (Walls and surfaces).
- A wider single wall is not two walls: it adds material to one extrusion instead of adding a second perimeter, so stiffness and failure behavior differ.
- Smoothed spiral paths trade accuracy for surface quality; the documentation notes that aggressive XY smoothing may distort the model (Special Mode).
- Spiral start and end transitions are the usual places for under-extrusion, which is why the starting and finishing flow ratios exist (Special Mode).
- Option names and locations are version-sensitive. The stable identities are the variables spiral_mode for the mode and wall_loops for the loop count, both documented in the official wiki for your release.
For print-time and motion choices after you settle on a wall strategy, see the separate Orca Slicer speed settings guide; speed settings do not add a second vase-mode wall.
Frequently Asked Questions
Does Orca Slicer have a two-wall spiral vase mode?
No. Spiral vase is documented as a single-walled print that spirals the outer contour continuously, so there is no second loop to switch on. Two walls are reachable only with spiral vase off.
Is a wider single wall the same as two walls?
No. Widening the extrusion puts more material into the same single pass, so the wall gets thicker, but there is still one perimeter and no structure between two walls. Stiffness and failure modes differ.
What do I change to get two walls instead?
Turn spiral vase off and set wall loops to 2. That gives two real perimeters per layer, at the cost of the seamless spiral surface and the return of ordinary layer seams. If strength matters more than appearance, consider more loops and some infill as well (Walls).


