What Precise Wall Changes in the Toolpath
Precise Wall is the reader-facing name for the precise_outer_wall boolean. The current Orca Slicer precision wiki lists it as a Simple-mode option that slightly increases the spacing between the outer wall and the inner wall in Inner/Outer order. With the option on, the overlap between the outer wall and its adjacent inner wall is set to zero.
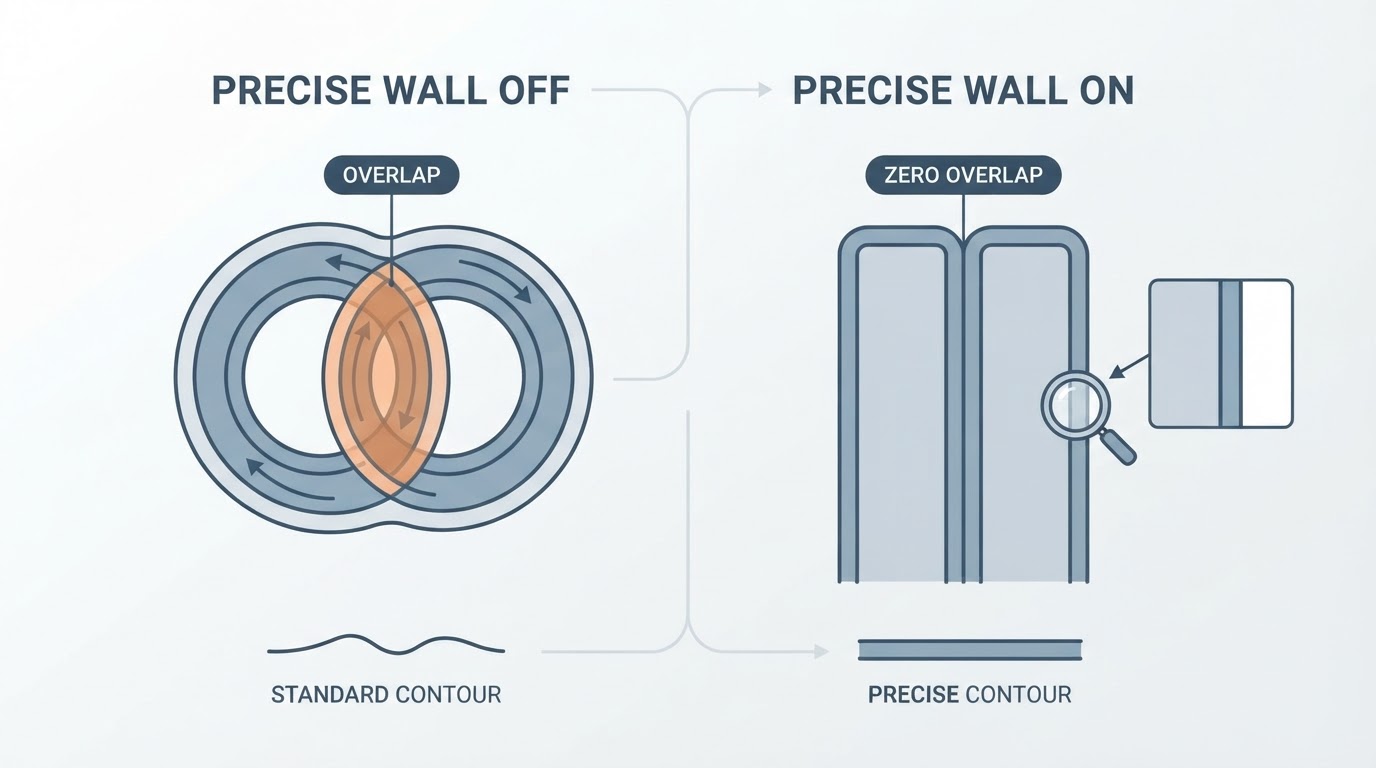
Slic3r and its forks treat an extrusion path as an oval, not a rectangle, so neighboring walls overlap. The wiki's example: two 0.4 mm walls at a 0.2 mm layer height produce about 0.714 mm of combined thickness instead of 0.8 mm. That overlap adds strength, but in Inner/Outer order it can push the outer wall outward, which can show up as oversized outside dimensions and inconsistent layers.
The project's documentation describes the zero-overlap path as keeping part strength unaffected while improving dimensional accuracy and layer consistency. Read that as the design intent of the control, not a promise about the parts you print.
Precise Wall Is Not XY Hole Compensation
XY hole compensation applies a signed offset to holes: positive values enlarge them, negative values shrink them. X-Y contour compensation does the same for the outside boundary. Neither changes wall-to-wall spacing the way Precise Wall does.
That difference gives you a starting point for diagnosis, not a diagnosis by itself. If outside dimensions run consistently large while holes measure acceptable, wall spacing and wall order are reasonable controls to check. If holes measure undersized at every height, XY hole compensation is the more direct control. If only the base is tight or flared, investigate elephant foot first. The OrcaSlicer hole compensation guide covers the sign, wall effects, and repeated-coupon method.
Precise Wall is not a dedicated hole offset, but do not assume it can never affect a measured hole. Wall geometry, flow, and material behavior interact, so check the actual part rather than treating either outcome as guaranteed.
Change one setting at a time; if wall spacing and XY compensation both move, you cannot tell which produced the change.
Check Wall Order Before You Blame the Setting
Precise Wall's documented behavior is tied to Inner/Outer order, so check the wall sequence first. The wall and surfaces wiki describes Inner/Outer as best for overhangs, Inner/Outer/Inner as best for outside finish and dimensional accuracy, and Outer/Inner as similar in outside quality with less consistent Z seams.
If your profile already uses Inner/Outer/Inner or Outer/Inner, the outer wall is not being squashed against an inner wall in the same way, so Precise Wall is less likely to be the lever that fixes an outside dimension. Look for another cause first.
Check the version in front of you too. The wiki lists it as a Simple-mode boolean, variable precise_outer_wall, CLI --precise-outer-wall=1. UI labels and defaults differ between builds, so confirm the control in your version and inspect the sliced toolpath.
A Repeatable Outside-Dimension Comparison
What follows is an illustrative trial plan, not an official minimum and not a proven experimental design. Adjust the counts to your time and parts; the point is to change one variable and measure it the same way each time.
Keep the model, filament, nozzle, layer height, temperatures, flow settings, walls, wall order, and orientation identical for every coupon. Fix flow, pressure advance, or temperature first; a wall-spacing trial on an unstable baseline measures noise.
Then run a paired comparison:
- Print three baseline coupons with Precise Wall off.
- Measure the same outside feature at the same points and orientation with the same calipers, at mid-height rather than only the first layer.
- Enable Precise Wall, change nothing else, and print three more coupons.
- Compare the direction and size of the difference across all six prints.
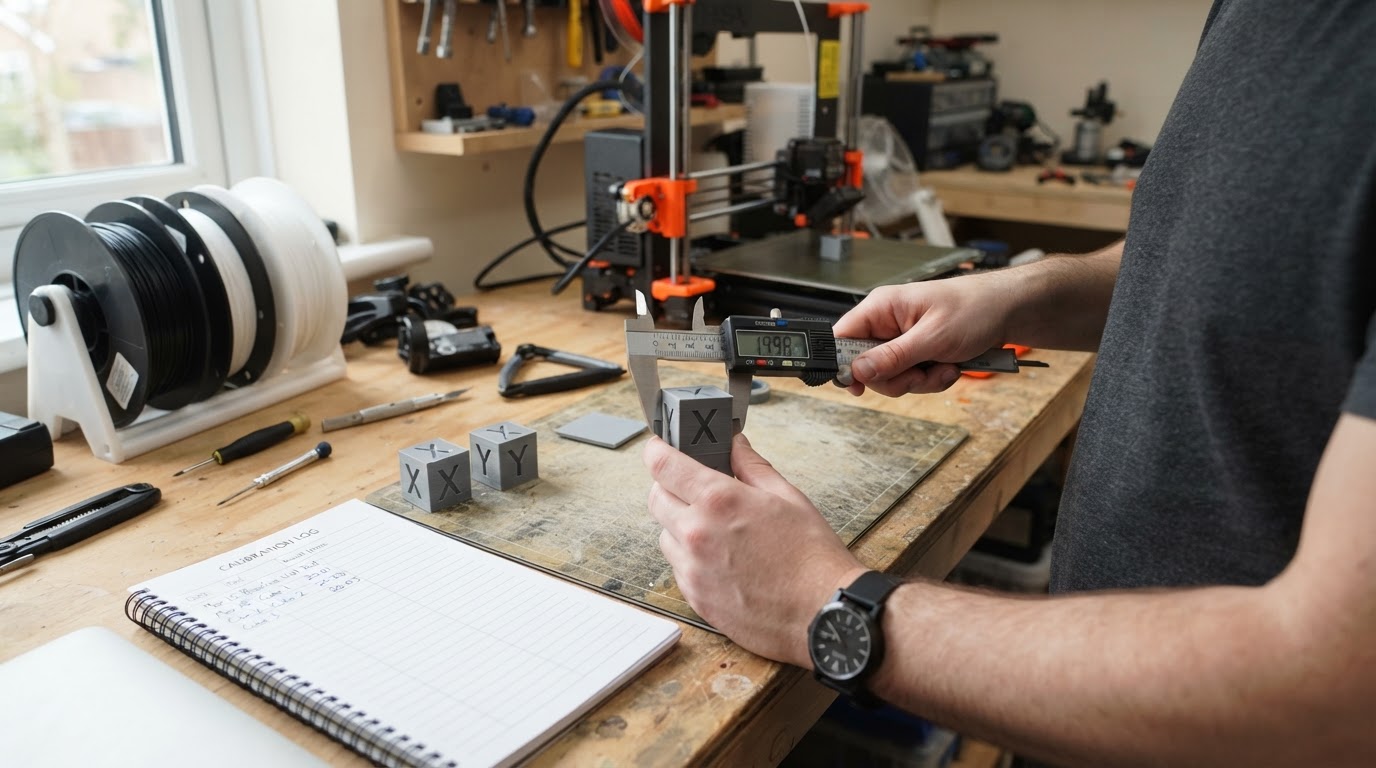
Caliper resolution is not measurement accuracy; jaw contact, part temperature, and measuring-point choice all matter. Six prints do not establish causality. A difference that repeats in the same direction across comparable prints is limited evidence about that setup, and thermal drift, a filament lot change, or a different measuring routine can still confound the result. Distinguish what this plan proposes from any test of your own.
Use the table below as a list of controls to consider, not as a verdict on a single observation:
Observation | Controls worth checking | Why they are relevant |
|---|---|---|
Outside dimensions consistently high, holes acceptable | Wall order, then Precise Wall | Overlap can push the outer wall outward in Inner/Outer order |
Holes undersized at every height | XY hole compensation | Signed XY offset aimed at holes |
Only the base is tight or flared | Elephant foot compensation | First-layer effect |
Completion standard: the direction repeats, the method stayed the same, and only Precise Wall changed. If it does not repeat, treat the result as inconclusive.
When to Try It and What It Cannot Do
Try Precise Wall when outside dimensions of an Inner/Outer print run consistently large, holes measure acceptable, and the rest of the profile is stable. It is also a reasonable companion when printing infill first, because the wall and surfaces wiki recommends Precise Wall, Inner/Outer/Inner, or reduced infill/wall overlap to stop infill pushing the outside wall.
Do not expect it to replace hole compensation, fix elephant foot, compensate for filament shrinkage, or correct loose belts and a miscalibrated extruder. It does not set a tolerance, guarantee a strength target, or replace a fit test, and it does not make a single measurement meaningful. Whether it affects a hole you measure is something to check on your parts, not to assume in either direction.
The honest summary is narrower than the control's design intent: Precise Wall removes one source of outward wall error in a specific wall order. Check the installed setting and the sliced path, hold everything else steady, and compare repeated dimensions before you credit the change.


