What the Wall Sequence Setting Changes
Wall sequence is not the same setting as Wall loops. Loops set how many perimeters the slicer generates; the sequence sets the order those perimeters are extruded in on each layer. The wiki lists the parameter as wall_sequence under the Walls printing order heading, with three values — inner wall/outer wall, outer wall/inner wall and inner-outer-inner wall — and the CLI override is --wall-sequence.
The same page notes that the order is applied to each side of a wall separately, so an outside contour and a hole's perimeter both follow the selected sequence.
Two other controls sit close to this one and change something different. Print infill first changes whether walls or infill come first in the layer. Precise Wall changes the spacing between the outer and inner wall. Neither of them sets which loop prints first.
How the Three Sequences Differ
Inner/Outer
Inner/Outer prints the inner wall before the outer wall. That is the order the wiki recommends for overhangs: when an overhanging external path is laid down, the neighboring inner perimeter is already there to adhere to. The documented cost is on the outside, where the external perimeter can be deformed by the inner wall printed before it.
Outer/Inner
Outer/Inner starts each layer on the outermost wall and works inward. The first extrusion of every new layer therefore begins on a visible surface, which the wiki says tends to make Z seams less consistent.
Inner/Outer/Inner
Inner/Outer/Inner prints the deeper inner walls from the third perimeter onward first, then the outermost wall, then the inner wall next to it. The wiki lists the best external surface finish and dimensional accuracy of the three as this order's benefit and recommends it over Outer/Inner in most cases. The same page notes weaker overhang performance, because the outer wall is printed without a printed inner neighbor beside it.
The order also needs at least three wall loops to have that effect. With one or two loops there is no third perimeter to print ahead of the outer wall, so the option cannot print the order it describes there; what your version does in that case is worth checking in the preview rather than assuming.
Order | Printed first on each layer | What the wiki documents |
|---|---|---|
Inner/Outer | Inner wall, then the outer wall | Best overhangs; the external perimeter can be deformed by the inner one |
Outer/Inner | The outermost wall | Seams tend to look less consistent, because the layer starts on a visible surface |
Inner/Outer/Inner | Inner walls from the third loop, then outer, then the adjacent inner wall | Best external finish and dimensional accuracy; weaker overhangs |
The Overhang Tradeoff Stays With the Order
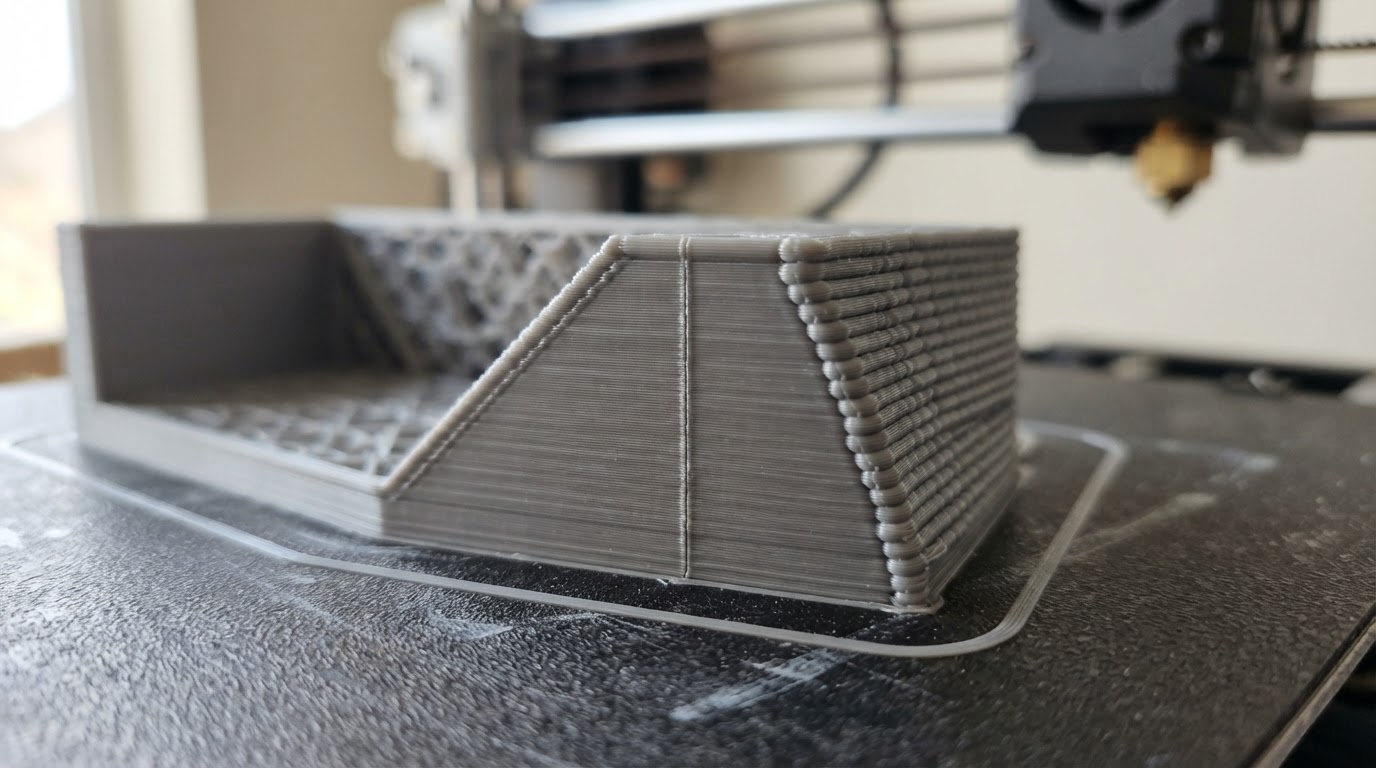
Inner/Outer/Inner gets its outer finish by printing the outer wall without the inner neighbor that Inner/Outer relies on. More wall loops do not remove that tradeoff: loops add perimeters to the shell, while the sequence decides the order they are printed in. Raising the loop count is therefore not the same decision as choosing Inner/Outer/Inner, and it does not by itself restore overhang support or settle how the outside finishes.
Which side of the tradeoff matters depends on the part. If the underside of an overhang is the surface that shows or has to fit, Inner/Outer keeps a printed perimeter under the outer wall. If the outside wall is what gets seen and measured, an outer-first order puts that wall down first, and with Outer/Inner the seam becomes the visible cost.
Comparing the Three on Your Part
Change the wall order and nothing else. Keep the model, the profile, the line width, layer height, temperatures, flow and speeds unchanged, and keep the wall count the same between runs. If you are testing Inner/Outer/Inner, give every run at least three wall loops so the comparison stays about order.
Then inspect the planned order on the layers that matter:
- Pick a layer with an outside overhang and step through the toolpath. Note which loop is drawn first and whether the outer wall has a printed neighbor beside it.
- Repeat on a thin feature and on the first layer. Actual behavior can differ there depending on your version and wall generator, so read those layers in your own preview rather than assuming they follow the main sequence.
- Find where the outer wall extrusion starts on each layer. With Outer/Inner, that start point is where the layer's visible seam is created.
The preview shows the planned path order, not the printed result: it does not tell you how the outside will finish, how an overhang will sag, or how strong the part will be. Print a sample of the same region once per order and compare them: outside finish, overhang edge, seam alignment, and the measured outside dimension at the same point.
A visible defect is a reason to run that comparison, not a diagnosis of the wall order. Rough overhang edges, seam banding or an outside dimension that runs large can come from several settings, and the sequence is one candidate among them.
Print Infill First Is a Separate Control
is_infill_first prints infill and the top and bottom shells before the walls. The wiki states that with this control enabled, the first layer still prints the walls first. That statement is about walls versus infill on the first layer; it does not promise that the wall order on that layer is Inner/Outer.
Because it changes a different part of the layer sequence, enabling it in the same print as a wall-order change leaves two variables. Test it on its own if you want to know which change produced the result.
Where Precise Wall Fits
Precise Wall changes the spacing between the outer and inner wall within Inner/Outer order and sets their overlap to zero, as described in our Precise Wall guide. It does not change which wall prints first, and it does not give an outer-first order the printed neighbor that Inner/Outer provides.
If the outside of a part looks wrong, settle the wall order and the wall count first, then look at spacing. Both controls affect the same surface, so changing them at once leaves you unable to tell which one moved the result.
Orca Print Notes is an independent publication about Orca Slicer and is not the OrcaSlicer project.


