What the Plugins window is, and which builds have it
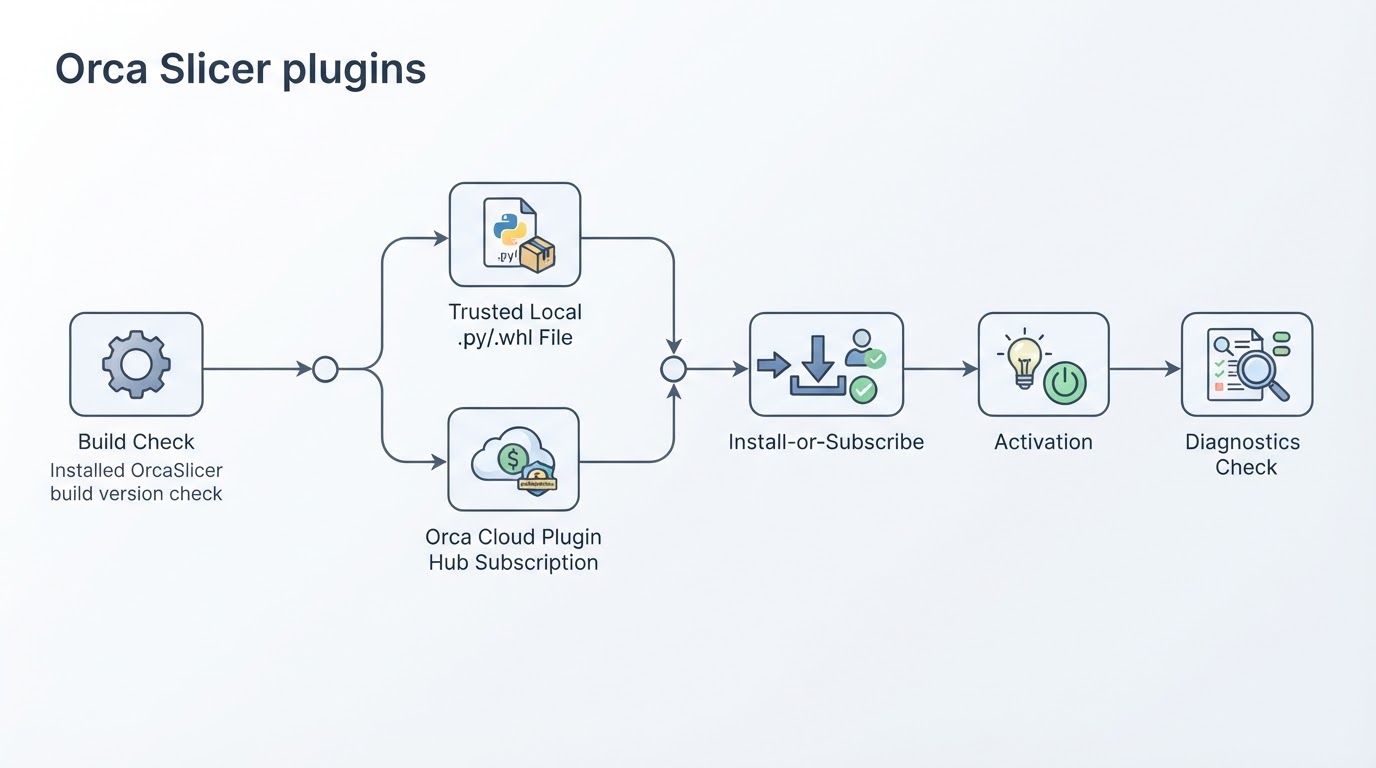
Plugins add extra features to OrcaSlicer, and the new plugin system is Python-based: a plugin is a .py script or a .whl wheel package that extends the slicer's workflows, for example with a utility script or post-processing capability. The official Getting Started guide says the Python Plugin System is available in Nightly builds or releases greater than 2.4.2.
An older build is one reason the Plugins entry may be missing. If you are running 2.4.2 or older, compare your version with the latest release information and the official plugin guide before changing builds. You can wait for a compatible stable release or use a Nightly if you accept pre-release software. The Orca Cloud guide is stricter for cloud plugins: its Beta plugin feature currently requires a current Nightly build.
Open the Plugins window
The entry point is short:
- Open the main menu.
- Click Plugins.
The window that opens has two parts. The upper table lists installed and available plugins; the lower section shows details for whichever plugin you select. The details area is organized into five tabs:
- Plugin Info — source, author, version, capabilities, and status.
- Description — information supplied by the plugin author.
- Config — configuration for the selected plugin's capabilities.
- Changelog — available version history.
- Diagnostics — loading and error information.
Every capability has a configuration. By default OrcaSlicer gives you a JSON editor, and a plugin can provide its own custom configuration page instead.
Install a local plugin
Use the split Browse plugins button to choose how you want to add a plugin. Install local plugin installs a plugin file from your computer, so pick the .py or .whl file you already have. After it appears in the list, check the plugin's Activate box so OrcaSlicer loads it.
Trust matters here. The official guide warns that plugins can interact with your files and your print workflow, so install only from sources you trust. A plugin file that arrived from a random download page or an unknown messenger is exactly the case that warning is about.
For the application itself, use the site's OrcaSlicer download-source guide rather than a mirror bundled with an unknown plugin.
Find and install cloud plugins through Orca Cloud
Cloud plugins live in Orca Cloud, the project's cloud platform, which is available starting with the OrcaSlicer 2.4.0 release. The flow works like a store: you subscribe to a listing in the Plugin Hub, then the plugin installs or loads inside OrcaSlicer.
- Sign in to Orca Cloud, and use the same account when you sign in inside OrcaSlicer.
- Use a current OrcaSlicer Nightly build. Plugins are a Beta feature in Orca Cloud and currently work only with current Nightly builds; a stable release without the Plugins feature will not show or load them.
- In Orca Cloud, open Plugins from the left navigation and browse Plugin Hub.
- Open a plugin and review the metadata panel: plugin type, supported operating system, compatible OrcaSlicer version, version, tags, and changelog.
- Click Subscribe.
- In OrcaSlicer, open File > Plugins, click Refresh if the list has not updated, and check the plugin's Activate box. OrcaSlicer installs or loads the plugin as needed.
Examples of what you will find range from small utility scripts to post-processing capabilities, and every listing carries the compatibility details described in the next sections. Plugins are optional — you can keep using OrcaSlicer without subscribing to or activating any of them.
Local or cloud: which path fits
Question | Local plugin | Cloud plugin |
|---|---|---|
Where the plugin file comes from | A | A listing you subscribe to in Plugin Hub |
Account needed | No Orca Cloud sign-in required | Yes — the same account in Orca Cloud and OrcaSlicer |
Build needed | A Nightly build or a release greater than 2.4.2 | A current Nightly build, since Plugins are Beta in Orca Cloud |
Reviewing before you install | Inspect the file's source and the Plugin Info tab | Review plugin type, supported OS, and compatible OrcaSlicer version |
Managing it later | Right-click the plugin: Delete/Unsubscribe, Show in folder, Reinstall | Unsubscribe in Orca Cloud, then remove it in the Plugins window |
Best fit | The plugin author handed you the file directly | You want discovery and compatibility details before you commit |
Check compatibility and trust before you activate
Compatibility is not guesswork if you read the right fields:
- In the Plugins window, Plugin Info shows the source, author, version, capabilities, and status; Description carries the author's own description, and Changelog gives version history.
- In Orca Cloud, the metadata panel lists the plugin type, the supported operating systems, and the Compatible OrcaSlicer Version — the minimum OrcaSlicer version the plugin requires. Compare that number with your build before subscribing.
- For cloud plugins, the file itself has to match your platform: Orca Cloud expects plugin filenames to carry a target OS suffix such as
my_plugin_win_x86_64.whl(macOS, Linux, Windows, andanysuffixes are supported).
If a listing has no clear author, no changelog, and no compatible-version field, treat that as a reason to keep looking.

Finish and verify (your completion check)
Installing is not the same as working. Use this short checklist:
- Click Refresh in the Plugins window if you installed, updated, or subscribed to a plugin and the list has not changed yet.
- Expand the plugin row and check that its capabilities are listed.
- Read the capability's status and open Diagnostics: loading and error information lands there, so a clean Diagnostics view is your signal that the plugin loaded.
- If a preset refers to a plugin or capability that is inactive or missing, OrcaSlicer shows a missing-plugin notification and cannot slice until the reference is resolved or the setting is changed. Clearing that notification is the real finish line for a print you intend to start.
Disabling a plugin or one of its capabilities removes it from the workflows that use it, so a capability you switched off earlier is worth checking first when something that used to work stops appearing.
Manage or remove plugins later
The official plugin-management guide documents the context-menu actions: Delete/Unsubscribe removes a local plugin or unsubscribes from a cloud plugin; Show in folder opens its location; Reinstall loads it again from its source file. Check the plugin type before using an action that removes it.
This is not the older Bambu network plugin
If you came here looking for the "Bambu network plugin" mentioned in older OrcaSlicer discussions, note that this guide covers a different mechanism. The Python plugin system above is what the Plugins window and the Orca Cloud Plugin Hub install, subscribe to, and activate: .py and .whl packages that add capabilities to the slicer. If the component you have in mind is not a Python plugin package, none of the steps in this article apply to it, and the Plugins window is not where it is managed.
Quick answers
Why is there no Plugins entry in my menu? Almost always the build. The Python plugin system arrives with Nightly builds or releases greater than 2.4.2, so a stable 2.4.2 installation will not have it.
Do I need an Orca Cloud account? Only for cloud plugins. Local plugins install from a file without signing in, and plugins as a whole remain optional.
Where do I get plugin files? Either from an author you trust, or from Orca Cloud's Plugin Hub, where each listing shows compatibility details before you subscribe.


